Monday, June 6, 2011

Party Spotlight! A Tailgating Shower

Typically wedding showers cater to the bride and the poor groom is only allowed to stop by at the end of the shower to lug the endless piles of gifts home.
Well move over ladies- times are changing! The latest trends not only includes the bride but also the groom in the matrimonial bliss of wedding showers and yes the opening of gifts. Your guy may moan and groan at the ideas of attending a wedding shower so the goal is to have the host create a theme that the groom will enjoy along with his buddies. So without futher ado I present to you A Tailgating Shower!

What guy's-guy doesn't LOVE football or better yet tailgating? Heck- what girl doesn't like a little booze and a game of cornhole(you know the game where you throw the corn bags into the hole-don't think dirty). This type of shower is not only fun for everyone but it is also a breeze to throw together.
Image Hosted by ImageShack.us
Start the event with a ticket stub invitation to set the playful mood. Is their house divided between teams? Even better- create the invite with the rival teams playing against each other. You can find these invites here.
Image Hosted by ImageShack.us

Next plan the decorations:
For a cute centerpiece use metal buckets (these were borrowed from a local bar but you can purchase them at most hardware stores)and fill them with several bottled beverages- don't forget- not everyone drinks so be sure to include some bottled non-alcholic beverages too:) A piece of burlap was used under the buckets along with a colorful piece of wrapping paper. Image Hosted by ImageShack.us


The atmosphere should be relaxed and fun therefore the set up does not have to be fancy yet simple touches like paper lanterns add a bit of charm. I think the best part about this shower is you can use what you have making it a little more cost effective. Differnt table sizes and tableclothes add to the tailgating feel.
The food is easy peasy- hotdogs, hamburgers, brauts, pasta salad, baked beans...you get the idea.

So now that your guy is included in the wedding "pre-game", don't you think he should also be included when it comes to writing all of Thank-You notes

Thursday, May 19, 2011

Lovin IT!

I have LOVED the past few weeks. I have gotten some unique orders which always make designing a bit more fun. So far I have been working on a moving announcement that involves a road trip from one state to the next, a birthday party invite that include a little girl painting a pig, and a winery luncheon that involves turning wine glass stains into an actual wine glass. These clients have really kept me on my toes.
DSC_0318
Want this Card? Click Here
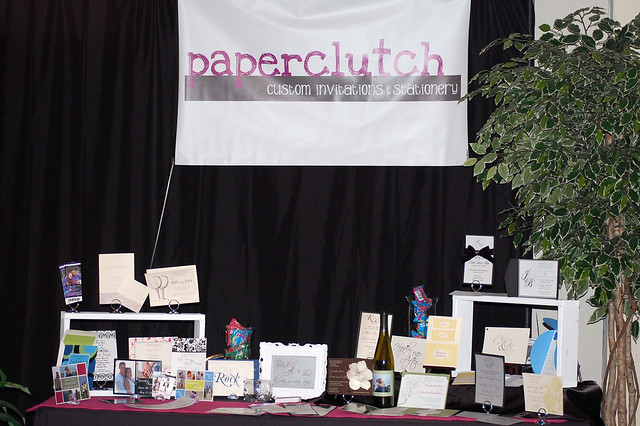
Not only I have been designing like a mad woman but I participated in my very first Bridal Show. Check out my booth- sorry for the terrible picture- I could not get the lighting right with the angle of my booth and my crazy extreme zoom lens.

DSC_0257
The ladies at Left Lane Productions did an awesome job putting this event on. FYI: To all you brides who attended the event you will receive a 10% discount off your order.
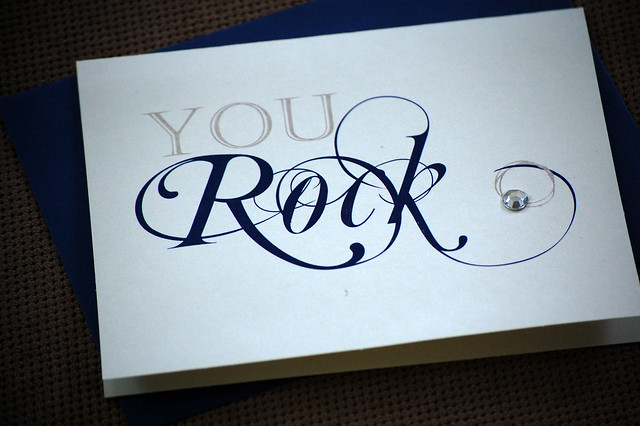
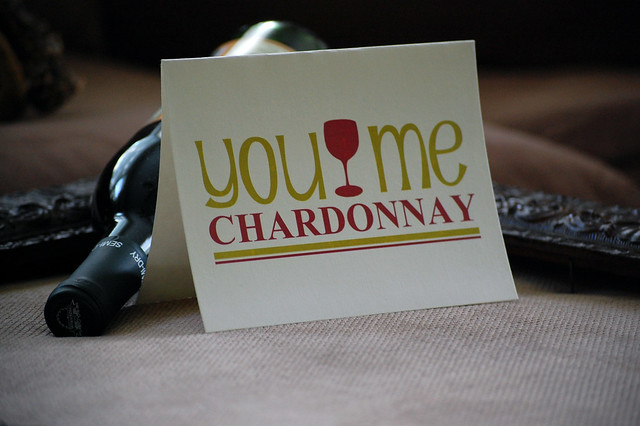
Check out the You Rock and You + Me Chardonnay Cards in my Etsy Shop. These are two new greeting card designs I recently created.
DSC_0311
Want this card? Click Here

Wednesday, May 11, 2011

Finished Works

Wow- I have been super busy lately. I wanted to fill you all in on a couple of invitations I have completed. Unfortunately I have been so busy, picture taking is on the back burner, therefore, I have not taken any good shots of my printed invitations so you will just have to settle for a digital version. I have a few more in the works but my rule is that I do not post any invitation or announcement until my client has put them in the mail.
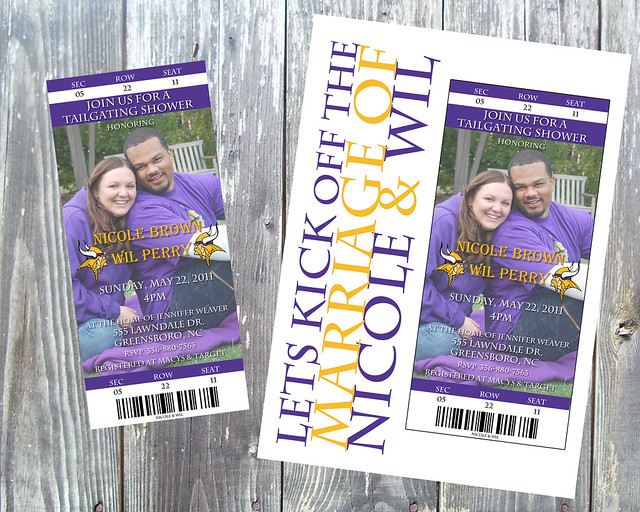
First I want to introduce you to my FABULOUS ticket stub design.
I was so excited by these invitations! I have always wanted to do a ticket stub invite and I finally got my chance. Nicole and Wil LOVE the Vikings - they are actually from MN so they have every right to be. Me along with a few of my work buddy's are throwing Nicole and Wil a couples shower next weekend and we decided on a tailgating theme - corn hole and all and thought that a ticket invite would set the mood for the party.
TicketSTUBonline

This invite was super easy since for Nicole and Wil's engagement photo shoot they requested pictures in their Vikings gear. I will have to post pictures of the actual party- I am in charge of decorations- another one of my favorite things.
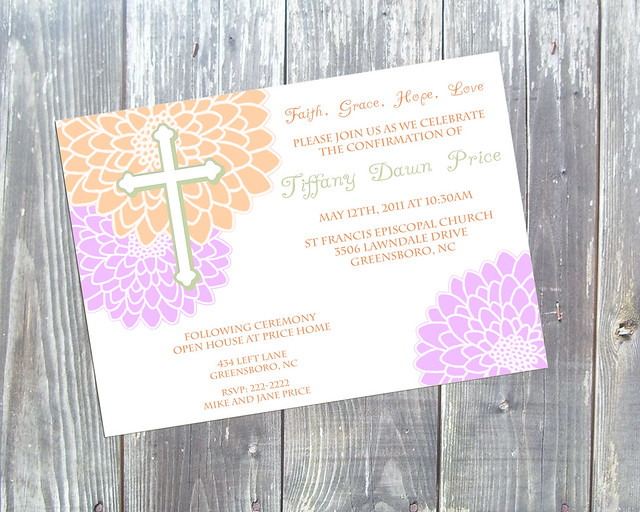
The next invitation is for a confirmation. This is the first confirmation invitation I have done. I think it turned out nicely. The color request was for a peach and green invitation but we decided to add some purple for more color.
Confirmationexample

This weekend I am participating in my FIRST bridal show. I am a little frantic getting everything ready but I have faith that everything will turn out smoothly. I think the hardest thing is figuring out just what to do with my table display. If you want more information about the bridal show click here.

Monday, April 25, 2011

A Couple's Graduation Invitation

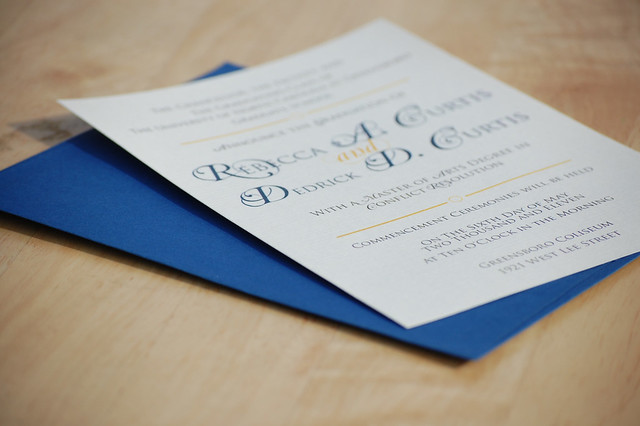
Rebecca and Dedrick are not only married but are both graduating next week with a Masters in Conflict Resolution. When Rebecca asked me to create one invitation for the both of them I was thrilled. What a cool idea to create a couples graduation invitation.
Graduation2
Forget about the traditional ivory paper with formal script - I used a cream linen paper with a dark blue envelope and included the traditional colors of the university. Congratulations Rebecca and Dedrick only a few more days!

Friday, April 15, 2011

In the works

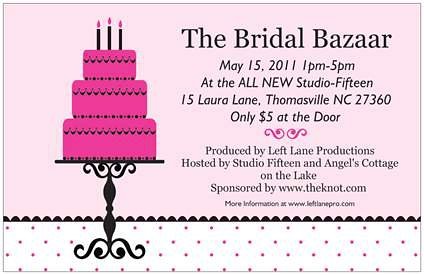
So I have again been a neglectful blogger for the last week. I have been busy busy with work, being a mom, and trying to get new pictures for my website. Also I have been prepping for a bridal show that will take place May 15th. YAY! This is my first ever. Check out the info below, if you live in area come check it out.
card
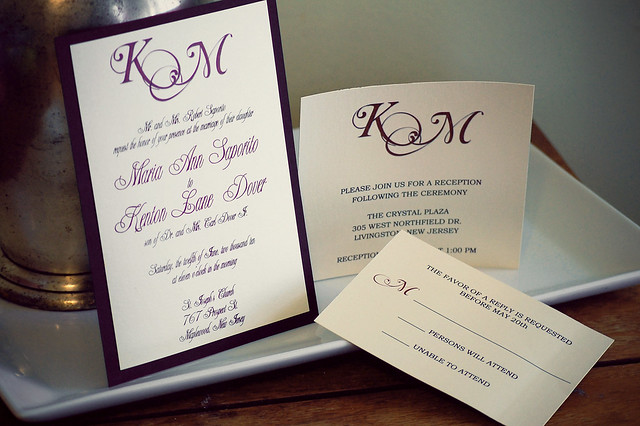
I also wanted to share an invitation I created last summer right before I was thrown on bed rest - Boo! Thankfully these invites were complete and delivered before I was on house arrest, I mean bed rest.
Maria3
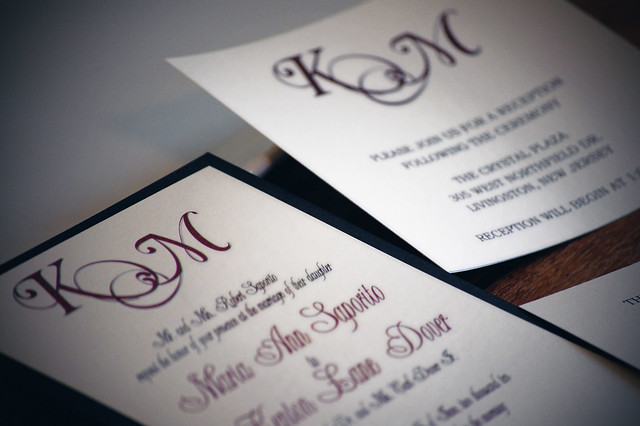
Maria and Kenton are such a cute couple! I am not just saying that because Kenton is my first cousin, truly they are. Maria and Kenton were married last summer in New Jersey but unfortunately I was not able to attend the wedding due to my pregnancy. Even though I could not be in New Jersey for their wedding I was lucky and excited to be part of their special day by creating their invitations.
Maria2
Maria's wedding colors were a burgundy color and black. I created the simple monogram which they used throughout their invitation. I think this monogram turned out nicely, I really like it and think the letters fit together perfectly. I used a shimmery cream paper backed by a plain black card stock. Now that I have show you guys a throwback I hope to post about my current invitations I have been working on. Stay tuned for a couples graduation invitation and confirmation invite. Also...I am working on the coolest invite for my dear friend Nicole's bridal shower. Super excited about this one. I have a lot of new pictures up on my facebook page and website. Check them out: www.paperclutch.com of Facebook

Thursday, April 7, 2011

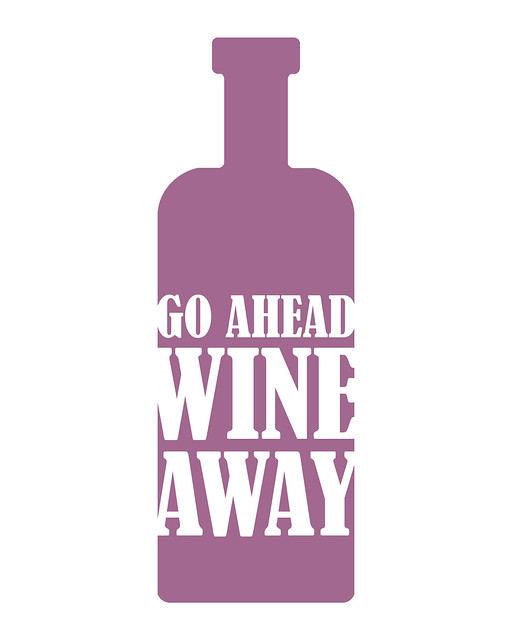
Go Ahead Wine Away...

Have you ever had one of those days or better yet weeks where you are such a Debbie Downer? You know those days...those days were everything you touch turns to MUD {one of my moms quotes} and you want to tell the world how horrible life is at the current moment.
WineawayFINAL
With the death of my camera lens, feeling like I am running in place with my business {I hate running}, and those stupid little things like waking up late, my pants getting a little too tight {grrr...}, and the house being a total mess I just feel like whining or more like Wineing. With that said I am going to go ahead and "wine" away - ha take that DAY! Don't worry I will only wine away with one glass- I am a mother now people...I have responsibilities!

You guys want to Wine Away too? You can get this print at my ETSY Shop. Here is the Link: Wine Away Print

Wednesday, April 6, 2011

So long....

So long my dear Nikon camera lens. It was a sad day on Monday when my Nikon camera lens decided to break. I guess I was a bit rough with it and letting my 3 year old niece tote it around on occasion did not help. It had handled enough abuse. With that I am sorry for the neglect to my blog. Without my camera there are no pictures and without pictures there are no good post {for us visual types at least}. Thankfully this ordeal allowed for me to order a new lens-Yay! One with better zoom. Hopefully it arrives by next week. So I leave you today with a throwback. This tutorial was one I created back in 2008 and many people have enjoyed making it. So check it out! Hopefully by next week I will have some new tutorials brewing.
A Spin off your Typical Corkboard


Making a Cork board is a very practical way to reuse/recycle old wine corks and create a unique and usable piece of art. There have been many tutorials to make a"Wine Cork Board" so I decided to give it a try but with a little twist. I first got the idea from Martha Stewart ; she had a great tutorial for making Cork hot pads with a metal pipe clamp. My first intentions were to make these since I became very frustrated with making a typical cork board, the measurements and the glue (ahhh), but then I got an idea...the circles are very sturdy and would make a unique look if I packed them together to create the cork board. What I used: *Lots and Lots of Corks...while I LOVE wine, I promise I did not consume the amount of corks present in the project. I had the help of a local bar, they kept the corks for me until they had a huge bucket filled up with them.

* A shadow box frame; I found mine at Hobby Lobby. They have great deals on frames certain weeks, sometimes up to 1/2 off. Carefully remove the glass from the frame. Some shadow boxes come with frames mounted in them, you can still use these but have to break the glass to remove it.

* Several sized metal pipe hangers (found in the plumbing section of the hardware store).

* Gorilla Glue; I tried several glues during my first attempt at a typical cork board. First good craft glue (the corks would not stay)..frustrated,,,then I tried hot glue without any luck...even more frustrated. So that is when I gave up on making a cork board and decided to make the hot pads instead. When I realized how using the pipe hangers created a solid piece of cork I began again on my cork board making. I avoided the two glues I used before and invested into Gorilla glue. it was my last try and so far so good. Step 1: The first thing I did was create the circles with the metal pipe hangers just like mentioned in Martha's Tutorial .

Step 2:I placed the circles in the shadow frame in the location I liked and then glued them down with the gorilla glue. Let them dry.

Step 3:Once the circles have dried into place you can being filling in the gaps with corks. You are not going to be able to fill every inch of the frame but this only gives it more character. So if you are perfectionist you might not want to try this craft. The little holes might just drive you nuts.

This process can take some time but the end result will be well worth it.

The funny thing about my board is that there are very few real corks. Most wine I drink has some type of rubber/plastic cork but they work just as well. If you make this project I would love to see the end results! E-mail me your finished piece pamscollages@gmail.com. Each one is bound to end up different. {enjoy}