Thursday, October 20, 2011

THE WINNER IS....

SAVETHEDATEGIVEA
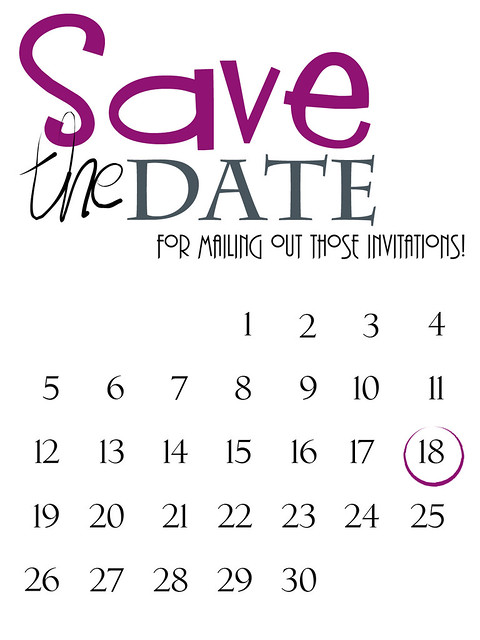
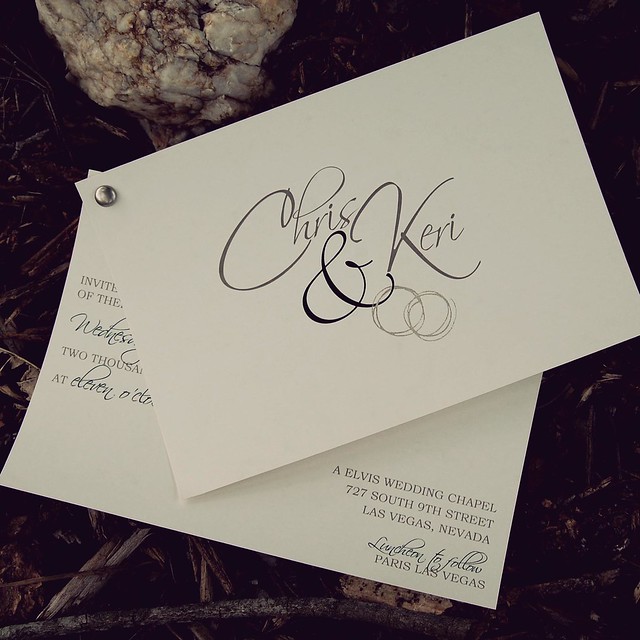
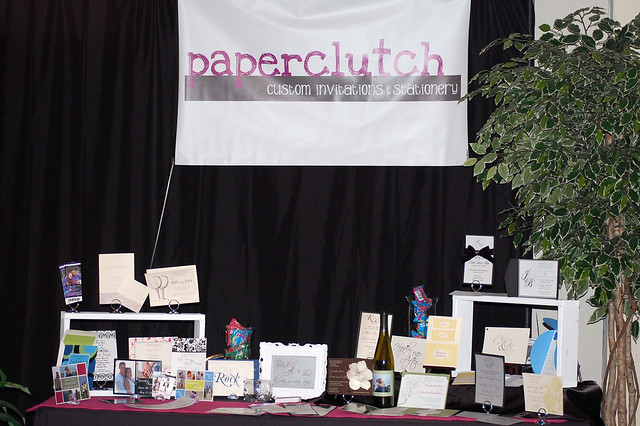
Congrats Kerri D. You are the winner of 50 Save-the-Dates

Wednesday, October 5, 2011

What I have been up to...

Time has flown by too quickly. I can not believe that summer is already gone but I am so excited that fall is here- yay. It is by far my most fave season. The cooler weather, cute boots and scarfs, pumpkins and Halloween, haunted houses, and scary movies, not to mention all of the candy. I think that October should be named national candy month. It is the one month out of the year that I don't feel guilty about eating one, two- heck even three pieces of candy after dinner. I wanted to show you guys a few designs I have been working on. Hopefully I can get back on track and get back onto the blogging wagon. Even my personal blog has been lost the entire month of September.


For Halloween I have been trying to create birthday designs that will be fun and festive yet not directly related to Halloween. As a kid I grew up with a July 6th Birthday. Every year my mom used red, white, and blue decor because it was all on sale so I feel for those holiday babies. With that said I think monsters and pirates are a great idea for a boys or even a girls themed party.


Happy Fall everyone!

Tuesday, August 16, 2011

Save-the-Date GIVEAWAY!

Hi All! Looking to score some really awesome Save-the-Dates perfect for your special day? Have a friend getting married in 2012 and want to win them a little something for their wedding?? Then what are you waiting for? Enter the Save-The-Date GIVEAWAY!
All you have to do is become a Fan of Paperclutch on Facebook if you haven't all ready. Here is the Link: http://www.facebook.com/paperclutch ,then complete the form below.
Entries for the Save-the-Date Giveaway need to be received by October 20th, 2011 12am. The giveaway will take place on October 20th. The winner will be announced on Paperclutch blog and I will also contact the winner by e-mail.

By completing the form you will be entered into the giveaway once. Want to up your chances? Have your friend enter too and list you as a referral. Each Referral gives you an extra entry. If you can not see the form below click HERE to enter.

Don't forget...you MUST be a fan of paperclutch in order to win. You do not have to be a bride in order to win. Friend or family of brides can enter the giveaway as well and transfer their winnings onto the bride. GOOD LUCK!

Wednesday, June 15, 2011

True Blood Party

My hubby and I LOVE Trueblood. We have been addicts since season one. For all of you Trueblood nuts out there don't forget that season 4 starts in just 1.5 weeks and what better way to kick off season 4 than to throw a party??
Image Hosted by ImageShack.us

I have come up with the perfect invitation for the event. I have also listed it in my etsy shop for purchase. Since time is limited to get these "suckers" out I am only offering a digital file at a discounted price $4. These can be e-mailed to your guests or even posted on Facebook. You will find the listing for purchase HERE.
Here are some other ideas to pull your party into full vampire mode.
Bottle Labels:
Image Hosted by ImageShack.us
Hostess with the Mostess has some great printables you can download for free. These are actually for a Twilight Movie party but I think they would work perfectly for True blood too.
Image Hosted by ImageShack.us
Here is another drink idea from Hostess with the Mostess: Vampire Martinis.
Etsy has a awesome video on how to make Bleeding cupcakes. Yum!

You can also play off the deep south theme and include menu items such as Po'Boy sandwiches or gumbo. So relax, invite a few friends over for some good food, good drinks, and one awesome show.

Thursday, June 9, 2011

Incorporating the Mason Jar

I have always had an obsession with mason jars. I even used them as inspiration for my wedding way on back in 2008. I will never forget checking out a venue before my wedding and telling the venue owner that I wanted to use mason jars at the reception. Can you believe this guy looks me dead in the eye and says..."what is this...Redneck Wedding?" I was appalled- who says that? So that venue was quickly marked off my list.

For the past week I have been trying to figure out a way to use the mason jar in an invitation design. I kept thinking firefly's and girly stuff and then out of the blue I thought about how awesome mason jars are as beer glasses and thus my mason jar as beer glass/ thirsty thirty party invitation was born. I loved the "Thirsty Thirty" quote and it's genuineness {I am sure someone has thought of this before me but for now I am claiming it}.

Image Hosted by ImageShack.us
Purchase this invitation at my etsy shop
.
Even though this invite is for a birthday party it can be so versatile too. It could be transformed into a bachelor party invite or even a save the date. I like the concept of printing this invite on a textured paper such as paper bag paper or butcher paper- heck you could even print these on paper bags!

To go along with the theme these s'more mason jar deserts would be perfect. You can find the recipe on the blog how sweet it is. It makes my mouth water just thinking about it- YUM!

Another genius idea is to use chalkboard paint so each guest can label and keep up with their mason jar. You can find the tutorial on Emmaline Bride's blog.
Image Hosted by ImageShack.us

source :: style me pretty via real wedding by by beaux arts photographie

I hope I have convinced you how awesome Mason jars are and you will find a reason to throw a party just to incorporate them. I know I will...darn hubby will not be 30 for another year.

Monday, June 6, 2011

Party Spotlight! A Tailgating Shower

Typically wedding showers cater to the bride and the poor groom is only allowed to stop by at the end of the shower to lug the endless piles of gifts home.
Well move over ladies- times are changing! The latest trends not only includes the bride but also the groom in the matrimonial bliss of wedding showers and yes the opening of gifts. Your guy may moan and groan at the ideas of attending a wedding shower so the goal is to have the host create a theme that the groom will enjoy along with his buddies. So without futher ado I present to you A Tailgating Shower!

What guy's-guy doesn't LOVE football or better yet tailgating? Heck- what girl doesn't like a little booze and a game of cornhole(you know the game where you throw the corn bags into the hole-don't think dirty). This type of shower is not only fun for everyone but it is also a breeze to throw together.
Image Hosted by ImageShack.us
Start the event with a ticket stub invitation to set the playful mood. Is their house divided between teams? Even better- create the invite with the rival teams playing against each other. You can find these invites here.
Image Hosted by ImageShack.us

Next plan the decorations:
For a cute centerpiece use metal buckets (these were borrowed from a local bar but you can purchase them at most hardware stores)and fill them with several bottled beverages- don't forget- not everyone drinks so be sure to include some bottled non-alcholic beverages too:) A piece of burlap was used under the buckets along with a colorful piece of wrapping paper. Image Hosted by ImageShack.us


The atmosphere should be relaxed and fun therefore the set up does not have to be fancy yet simple touches like paper lanterns add a bit of charm. I think the best part about this shower is you can use what you have making it a little more cost effective. Differnt table sizes and tableclothes add to the tailgating feel.
The food is easy peasy- hotdogs, hamburgers, brauts, pasta salad, baked beans...you get the idea.

So now that your guy is included in the wedding "pre-game", don't you think he should also be included when it comes to writing all of Thank-You notes

Thursday, May 19, 2011

Lovin IT!

I have LOVED the past few weeks. I have gotten some unique orders which always make designing a bit more fun. So far I have been working on a moving announcement that involves a road trip from one state to the next, a birthday party invite that include a little girl painting a pig, and a winery luncheon that involves turning wine glass stains into an actual wine glass. These clients have really kept me on my toes.
DSC_0318
Want this Card? Click Here
Not only I have been designing like a mad woman but I participated in my very first Bridal Show. Check out my booth- sorry for the terrible picture- I could not get the lighting right with the angle of my booth and my crazy extreme zoom lens.

DSC_0257
The ladies at Left Lane Productions did an awesome job putting this event on. FYI: To all you brides who attended the event you will receive a 10% discount off your order.
Check out the You Rock and You + Me Chardonnay Cards in my Etsy Shop. These are two new greeting card designs I recently created.
DSC_0311
Want this card? Click Here

Wednesday, May 11, 2011

Finished Works

Wow- I have been super busy lately. I wanted to fill you all in on a couple of invitations I have completed. Unfortunately I have been so busy, picture taking is on the back burner, therefore, I have not taken any good shots of my printed invitations so you will just have to settle for a digital version. I have a few more in the works but my rule is that I do not post any invitation or announcement until my client has put them in the mail.
First I want to introduce you to my FABULOUS ticket stub design.
I was so excited by these invitations! I have always wanted to do a ticket stub invite and I finally got my chance. Nicole and Wil LOVE the Vikings - they are actually from MN so they have every right to be. Me along with a few of my work buddy's are throwing Nicole and Wil a couples shower next weekend and we decided on a tailgating theme - corn hole and all and thought that a ticket invite would set the mood for the party.
TicketSTUBonline

This invite was super easy since for Nicole and Wil's engagement photo shoot they requested pictures in their Vikings gear. I will have to post pictures of the actual party- I am in charge of decorations- another one of my favorite things.
The next invitation is for a confirmation. This is the first confirmation invitation I have done. I think it turned out nicely. The color request was for a peach and green invitation but we decided to add some purple for more color.
Confirmationexample

This weekend I am participating in my FIRST bridal show. I am a little frantic getting everything ready but I have faith that everything will turn out smoothly. I think the hardest thing is figuring out just what to do with my table display. If you want more information about the bridal show click here.

Monday, April 25, 2011

A Couple's Graduation Invitation

Rebecca and Dedrick are not only married but are both graduating next week with a Masters in Conflict Resolution. When Rebecca asked me to create one invitation for the both of them I was thrilled. What a cool idea to create a couples graduation invitation.
Graduation2
Forget about the traditional ivory paper with formal script - I used a cream linen paper with a dark blue envelope and included the traditional colors of the university. Congratulations Rebecca and Dedrick only a few more days!

Friday, April 15, 2011

In the works

So I have again been a neglectful blogger for the last week. I have been busy busy with work, being a mom, and trying to get new pictures for my website. Also I have been prepping for a bridal show that will take place May 15th. YAY! This is my first ever. Check out the info below, if you live in area come check it out.
card
I also wanted to share an invitation I created last summer right before I was thrown on bed rest - Boo! Thankfully these invites were complete and delivered before I was on house arrest, I mean bed rest.
Maria3
Maria and Kenton are such a cute couple! I am not just saying that because Kenton is my first cousin, truly they are. Maria and Kenton were married last summer in New Jersey but unfortunately I was not able to attend the wedding due to my pregnancy. Even though I could not be in New Jersey for their wedding I was lucky and excited to be part of their special day by creating their invitations.
Maria2
Maria's wedding colors were a burgundy color and black. I created the simple monogram which they used throughout their invitation. I think this monogram turned out nicely, I really like it and think the letters fit together perfectly. I used a shimmery cream paper backed by a plain black card stock. Now that I have show you guys a throwback I hope to post about my current invitations I have been working on. Stay tuned for a couples graduation invitation and confirmation invite. Also...I am working on the coolest invite for my dear friend Nicole's bridal shower. Super excited about this one. I have a lot of new pictures up on my facebook page and website. Check them out: www.paperclutch.com of Facebook

Thursday, April 7, 2011

Go Ahead Wine Away...

Have you ever had one of those days or better yet weeks where you are such a Debbie Downer? You know those days...those days were everything you touch turns to MUD {one of my moms quotes} and you want to tell the world how horrible life is at the current moment.
WineawayFINAL
With the death of my camera lens, feeling like I am running in place with my business {I hate running}, and those stupid little things like waking up late, my pants getting a little too tight {grrr...}, and the house being a total mess I just feel like whining or more like Wineing. With that said I am going to go ahead and "wine" away - ha take that DAY! Don't worry I will only wine away with one glass- I am a mother now people...I have responsibilities!

You guys want to Wine Away too? You can get this print at my ETSY Shop. Here is the Link: Wine Away Print

Wednesday, April 6, 2011

So long....

So long my dear Nikon camera lens. It was a sad day on Monday when my Nikon camera lens decided to break. I guess I was a bit rough with it and letting my 3 year old niece tote it around on occasion did not help. It had handled enough abuse. With that I am sorry for the neglect to my blog. Without my camera there are no pictures and without pictures there are no good post {for us visual types at least}. Thankfully this ordeal allowed for me to order a new lens-Yay! One with better zoom. Hopefully it arrives by next week. So I leave you today with a throwback. This tutorial was one I created back in 2008 and many people have enjoyed making it. So check it out! Hopefully by next week I will have some new tutorials brewing.
A Spin off your Typical Corkboard


Making a Cork board is a very practical way to reuse/recycle old wine corks and create a unique and usable piece of art. There have been many tutorials to make a"Wine Cork Board" so I decided to give it a try but with a little twist. I first got the idea from Martha Stewart ; she had a great tutorial for making Cork hot pads with a metal pipe clamp. My first intentions were to make these since I became very frustrated with making a typical cork board, the measurements and the glue (ahhh), but then I got an idea...the circles are very sturdy and would make a unique look if I packed them together to create the cork board. 
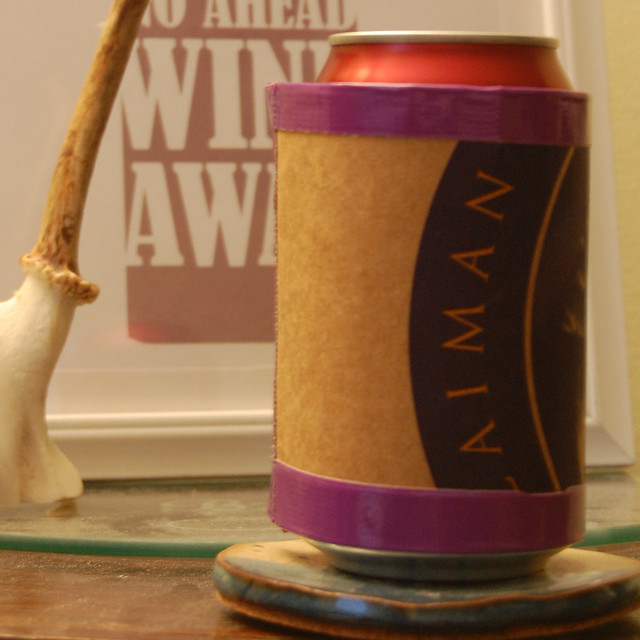
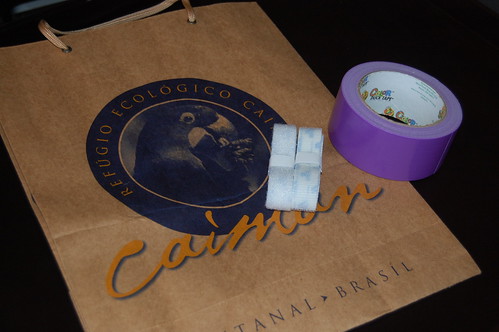
What I used: *Lots and Lots of Corks...while I LOVE wine, I promise I did not consume the amount of corks present in the project. I had the help of a local bar, they kept the corks for me until they had a huge bucket filled up with them.

* A shadow box frame; I found mine at Hobby Lobby. They have great deals on frames certain weeks, sometimes up to 1/2 off. Carefully remove the glass from the frame. Some shadow boxes come with frames mounted in them, you can still use these but have to break the glass to remove it.

* Several sized metal pipe hangers (found in the plumbing section of the hardware store).

* Gorilla Glue; I tried several glues during my first attempt at a typical cork board. First good craft glue (the corks would not stay)..frustrated,,,then I tried hot glue without any luck...even more frustrated. So that is when I gave up on making a cork board and decided to make the hot pads instead. When I realized how using the pipe hangers created a solid piece of cork I began again on my cork board making. I avoided the two glues I used before and invested into Gorilla glue. it was my last try and so far so good. Step 1: The first thing I did was create the circles with the metal pipe hangers just like mentioned in Martha's Tutorial .

Step 2:I placed the circles in the shadow frame in the location I liked and then glued them down with the gorilla glue. Let them dry.

Step 3:Once the circles have dried into place you can being filling in the gaps with corks. You are not going to be able to fill every inch of the frame but this only gives it more character. So if you are perfectionist you might not want to try this craft. The little holes might just drive you nuts.

This process can take some time but the end result will be well worth it.

The funny thing about my board is that there are very few real corks. Most wine I drink has some type of rubber/plastic cork but they work just as well. If you make this project I would love to see the end results! E-mail me your finished piece pamscollages@gmail.com. Each one is bound to end up different. {enjoy}

Wednesday, March 30, 2011

Is it Wednesday Already?


{From Martha Stewart Weddings, Fall 2007}

Wow...I just realized it is already Wednesday and I have failed to post anything so far this week. To apologize I have a printable for you guys!

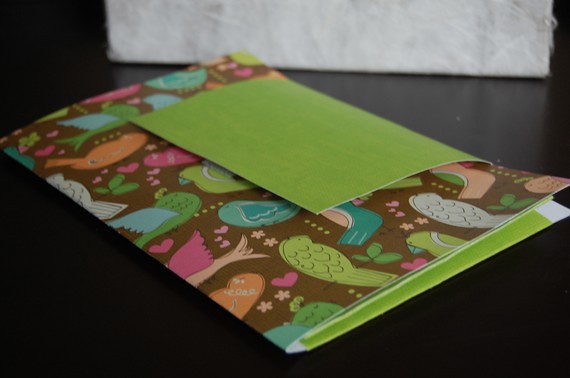
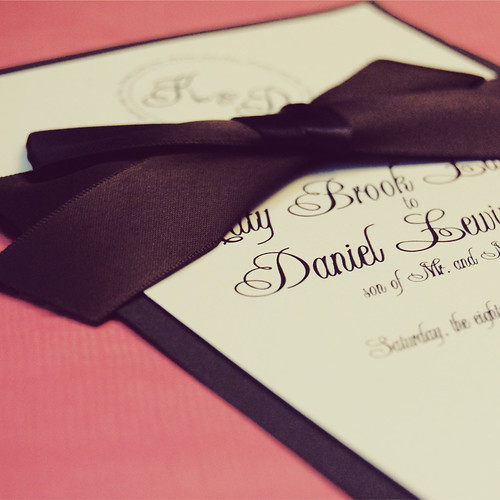
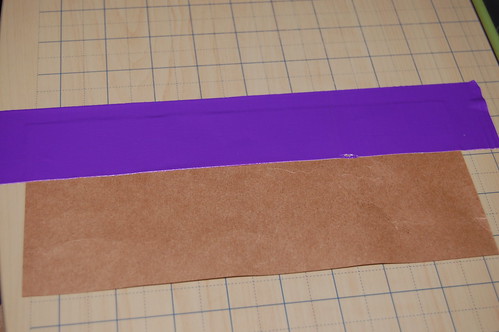
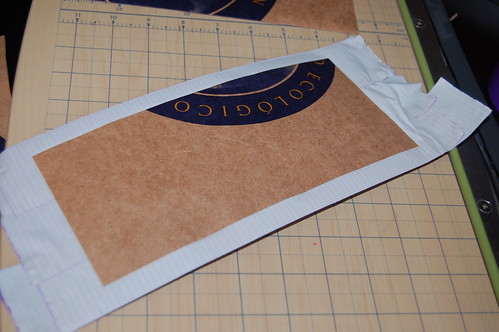
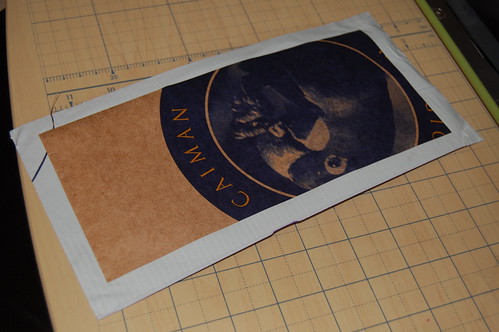
I am in love with Martha Stewart's wrap around labels. I know, I know some think that using labels on any invitation is tacky and impersonal but, my friends, these labels are too cute. Admit it, you would not dare throw away an envelope that is as cute as this? I took Martha's template and added a bit of swirl, check out my template here.

Friday, March 25, 2011

Museum of Wonder

I saw this guy on an episode of American Pickers on the History Channel. His art work is odd but awesome all at the same time. Makes me want to go to Alabama just to visit his museum.

Butch Anthony's Museum of Wonder from Etsy on Vimeo.


I think it is amazing how a person can transform simple everyday material into works of art or functional items in their home. What is trash to one is art to another.

And the Winner is.....

brownbird


Commenter #4 Amy K. Homemade Gourmet ground beef & rice skillet (uses the Ooo La La Onion mix). So easy & so good!

I will be contacting you shortly Amy!

Thanks to all who entered.

Wednesday, March 23, 2011

Timing is Everything {mailing invitations}

invite

I just wanted to take a minute to discuss timing for mailing out invitations. This is a crucial step for any event, party, or wedding. If you mail out your invitation too early your guest may misplace the invitations and forget about the event. Send the invitation too late and the guest may already have plans.

Here are a few time lines to keep in mind:

Wedding Save the Dates: 5-10 Months prior to event

Wedding Invitations: 6-8 weeks prior to event

For a wedding, mail out dates are crucial. Especially if your wedding is right in the middle of wedding season {spring or summer}. During a busy wedding season some guest may be invited to more than one wedding on the same day, therefore, they need adequate time to pencil your event in on their calendar. In the past I have experienced bridal wars where brides have requested their order to be rushed to avoid another bride’s invitation getting out before theirs. Weddings can be a battle!


To help you figure out the correct time to have your invitations stamped, addressed, and put in the mail I created a cheat sheet. Wedding Mail Out Cheat Sheet

I also included a column of ideal RSVP deadlines. All you need to do is find your wedding date on the left column and then note the dates that are listed to the right. If you get your invitations in the mail within this time frame the etiquette police won't be knocking at your door – but that bride who is getting married on the same day might.

For other types of invitations like birthday parties and formal dinners follow these guidelines.

Cocktail Party: 1-4 weeks prior to event

Formal Dinner or Party: 3-6 weeks prior to event

Informal Dinner or Party: A few Days to 3 weeks prior to event

So, don't forget to...
savethedateinvites

Monday, March 21, 2011

GIVEAWAY and Paper Clutches in Shop


So I have decided to do a giveaway for a menu planner paper clutch. The giveaway will take place on Friday, March 25th at 12pm and I will post the winner's name. I will also contact you via facebook or e-mail {if listed}. Be sure to leave at least your first name and last initial if you are posting anonymous. To enter all you need to do is become a fan of paperclutch on Facebook and leave me a comment under this post with one meal you plan to make this week. If you have a link to the yummy recipe please post. I love new meal ideas.

After several requests I have decided to post a few menu planner-paper clutches in my shop for purchase. They will include 12 menu planning sheets. I only have 3 listed but have a few more to post. If I happen to sell out and you are interested please contact me via e-mail pam@paperclutch.com

Thursday, March 17, 2011

Oops...did you forget your green today?

No worries. If you are in the office of getting your kids ready for school print out these labels QUICK. Or be a Patty's Day fairy and give anyone you see without green on a sticker. Nobody wants to be pinched!
They should work with Avery 5160 or 5960
St. Patrick Day Labels


Happy St. Patrick's DAY!

Wednesday, March 16, 2011

Paper Bag Koozie Tutorial!

kooziecraft

St. Patty's day is less than a day away and you my friends need to be prepared!

First don't forget to plan an outfit tomorrow that contains some green- and don't forget about the kids; they are more likely to reap the consequences and get a pinch or two.

Second- Make an awesome koozie for your beverage of choice, if your having a St. Patty party make one for all of your guest - So you are thinking- why paper bag? Well when I travel to my parents house and they send me home with some frozen goodies they wrap it in a paper bag. I am no scientist but apparently it helps keep the food cold. So I thought this may work for a beverage too. Not to mention when you make your guest their own personal koozie you can personalized them so no one tries to steal someone elses booze.

What you need:
paper bag
duck tape
Velcro
scissors
x-acto knife - or box cutter {I know I live on the edge}

DSC_0890


1.Cut your paper bag to size. You can make several koozies out of one paper bag
Can: 4" x 9"

You could make one for a bottle too. Just wrap a piece of paper around one and create a template.

2. Flip the cutout over to the side you don't want visible and start layering the back with duck tape. I left 1/2 inch on the top and bottom. Don't worry if your sides are not even. You will trim them later. I used 2 layers of duck tape.
DSC_0895
DSC_0896

When you flip the cutout back over the piece will look like this:
DSC_0897

3. Now trim the sides. I keep the sides 1/2 inch like the other sides.
DSC_0902

4. Before you start folding the sides over you need to cut out the duck tape corners on each side. I use an box cutter to cut these out- an x-acto knife or scissors are probably a safer bet.
DSC_0905

DSC_0904

5. Now fold all of the sides up.
DSC_0907

6. Now it is time to attach the Velcro. The easiest way to do this is put both pieces together and then take the backing off one side and attach it. Then take the backing off the other piece {still attached} and wrap the koozie around the can and attach. This will insure koozie is the right size.
DSC_0908

DSC_0912

Ta-da! You've got a paperbag koozie
kooziecraft

Now Relax and enjoy your St. Patty's day!

Tuesday, March 15, 2011

What's in a Monogram?

Hi Guys! So I wanted to take a minute to discuss monograms. These little lovelies are becoming a necessity to the modern bride as well as the DIY bride. I want to share a few tips and of course mention a bit of etiquette when using a monogram.
Monogram
Monograms can be used for so many things and help to carry out the theme of a wedding. Just to give you a few examples: you can add it to your invitation, create stickers for wedding favors, add it to your return address labels, create a thank you card, I could go on and on.
exampleinvite

Many designers including myself offer a digital monogram that you purchase and use as you wish. Just be sure that the designer is willing to work with you in the future if the monogram needs to be re-sized or in a special format. Once you are let loose to use your monogram you may be stopped in your tracks. Some printing services require specific formats and sizes or they will not print your design.
That is why I include one reformatting for each monogram I create custom or customized. I also keep your design for up to one year if you need additional formatting.
etiquette

There are certain rules associated with monograms. Not all have to be followed but it is a good idea to know what the rules of etiquette are so when you break them you are making a statement not an embarrassing mistake.

1. Who's name is first? The woman's name is suppose to comes first. This is true also when you address envelopes with the man and woman's name {example: Tina and Jim Smith} Why you ask? Well the man's name is never suppose to be separated from his last name.
As you see in the first picture as well as the 2nd example I posted the bride has broken this rule. When creating a monogram pre-wedding a last name typically is not associated with the monogram; therefore, if the man wants his name first let it be. There will be more important things to argue about- I promise.
You would be amazed at how many brides request the man's name to be first. Personal opinion...Breaking of this rule is no biggie when a last name is not associated.

2. This brings us to etiquette rule number two. NEVER and I repeat NEVER use a monogram with your "to be" married last name or initial before you are actually married. I know you have spent endless hours writing your new name and dream of your names together on paper but this my friends is the biggest monogram "no-no". The only time it would be acceptable to use a monogram that includes your new last name would be after you are actually married, for example during the reception.

Now that you know the rules, get out there and put your monogram to use!